Sunday, May 31, 2020

Quick and simple card!

Card designed by Sharon M. Reinhart May 2020
Stopping by with one of those ultra quick cards today! This one makes use of an older printed paper, one that started out as 12-inch, with a variety of different size printed panels on it. Many scrapbookers love these types of papers for project life style scrapbooking and pocket pages and to add to their compositions. Don’t miss out on this wonderful resource card makers!
This card began as an A2 side fold white card base. Next I layered a strip of teal card stock to the right side. The next step is to layer one of those printed paper panels, trim as needed. To create a spotlight effect on the sentiment on the printed panel I created a window using a Lawn Fawn die (Reverse Stitched Scalloped Circle window) along with a standard circle die from Spellbinder’s. To add some dimension the Scalloped window has been adhered with foam mounting tape. A stamped and die-cut simple strip from Taylored Expressions was added to complete the sentiment’s message. The finishing touch is a few sequins scattered around the card. I hope you like this card and see the value of using these types of papers and panels within card making!

Sunday, May 17, 2020

Mini Notes - works of heart!

Mini notes designed by Sharon M. Reinhart May 2020
We all have days where finding your creative muse, mojo, inspiration, whatever you call it sometimes eludes you. I too have times like this. Rather than give up and get upset because I didn’t create anything - I choose to create my works of heart! Miniature note cards that can provide joy to others while giving my heart a creative release. These mini notes are a perfect way to let someway know you are thinking of them, appreciate them, thank them for their kindness or gift or to let them know that they simply make you smile! These little works would also make perfect random acts of kindness notes! You could also make occasion specific ones such as Birthday and anniversary and tuck them
into the gift or bag. A supply of these little gems are great to have on hand. The point is, is that it is a smaller canvas and allows you to complete it quite quickly. If you wish to make them the same or create them all different, that is also fine. Remove the perimeters and the expectations! Sometimes these even serve another purpose and unexpectedly kickstart your creativity and allow your muse to fly right in!
Pull out your scrap papers, leftover stamped images, die-cuts, etc., which also gives you that warm fussy feeling of putting things to good use rather than discarding. I have stamped sentiments ready to go, typically just stamping on white card-stock with black ink. This will usually go with most mini notes you make however if you wish to customize just sponge a colour onto the sentiment.
You may wish to create a little station or tub where you have cut, scored and folded card bases to go along with your sentiments and other pieces. Most of my mini works of heart are 3-1/2 inches square. You may be worried about envelopes, don’t be! Just take a business size envelope (4-1/8 x 9-1/2), seal the flap then cut in half at 4-3/4 inches, score at the 4 inch mark at the open end. Cut the two corners at the open end on diagonal (mitre). Fold the front flap down and trim away the back flap. A
couple pieces of scor-tape (sookwang) on the flap and this envelope is ready for a work of heart! I hope you have been inspired to create!
Creatively Yours,
Sharon

Saturday, May 9, 2020

For Mom!

 Card designed by Sharon M. Reinhart
Stopping by to share this card perfect to honour Mom! This card has been created with some great die templates from Lawn Fawn, Cheery Lynn Designs and Pink Fresh Studio. A little texture was added with a Sizzix floral embossing folder and the final accents a few punched flowers! Happy Mother’s Day!
Creatively Yours,
Sharon

Tuesday, May 5, 2020

Flower for Mom - kids craft project


With Mother's Day quickly approaching I thought I would share this flower project for the little's to do. My 2.75 year old granddaughter had fun making these with a little adult assistance, so it is suitable for a range of ages. Some of the supplies that I used are the Flower Frame die template from Lawn Fawn, circle die template from Spellbinder's, tag punch from Fiskars Crafts and sentiment stamp from Taylored Expressions.

Supplies:
  • card stock flower shape, leaf shape, 2 and 1-inch white card stock circles
  • variety of 1-inch squares of tissue paper
  • sentiment stamp or computer generate
  • coloring medium of choice - crayons, markers, paint or ink
  • foam mounting tape, white glue
  • popsicle stick or skewer
  • pencil with eraser
  • children's scissors and/or adult assistance with
  • scrap of white cardstock for sentiment
Instructions:
  1. Die-cut, punch or fussy cut card stock shapes if not already completed
  2. Color flower petals with desired medium and leaf if necessary
  3. Glue 2-inch circle to back of flower shape if using the Flower Frame shape, apply glue only to outside edge of circle.
  4. Pick up piece of tissue paper on end of pencil eraser, scrunch around eraser, dab lightly into white glue and press down onto center of flower. ** for younger children to make it easier have them simply scrunch the tissue paper in their hands, dab into glue and then press onto center of flower.
  5. Continue in same manner until flower center is full of tissue paper.
  6. Adhere stick to back of flower by placing a strip of foam mounting tape over stick, tape should be hugging stick. Apply foam mounting tape to the top, left and right sides of the 1-inch circle, to hide stick and finish back.
  7. Adhere 1-inch card stock circle on top of stick.
  8. Apply glue to the inside fold of the leaf and one leaf, adhere around the stick.
  9. Stamp or computer generate sentiment. Trim out with scissors, die-cut or punch.
  10. Adhere sentiment to flower.
  11. Optional - apply adhesive rhinestone to sentiment tag.
Here are some step out photos to assist you with this project.

Step 2
Step 3
Step 4
Step 5
Step 6
Step 7 & 8


Steps 9, 10 & 11


I hope you have some creative fun with your little's and this project and that you have been inspired to create!
Creatively Yours,
Sharon

Monday, May 4, 2020

Tea-bag folded card

Card designed by Sharon M. Reinhart
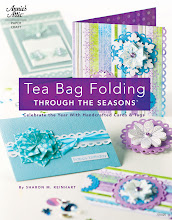
I have been trying to sort through supplies and leftover kits from make and takes and classes that I have taught. Each time I find a leftover kit I get drawn away to see what different card I can create using the supplies. This is my take on one, it turned out quite a bit different from the original and I am pleased with it. My point with this post is if you find left over kits and supplies just switch it up a bit, simple changes is all that it takes to breath new life into a card. For this one I changed the tea bag fold and incorporated what I refer to as a square fold, beginning with a basic triangle fold and then adding a progression by tucking the top layer under to create a square. In my book and online/DVD class there are more complete instructions or video tutorial. If you are having difficulty finding any of them please leave a message and I will see if I have it in stock or if I can point you in the right direction to purchase.

The other change was to borrow more squares of the printed paper from an additional kit, originally prepped for the tea bag folding and repurpose them by cutting in half and then creating a border at the top and bottom of the card.

Another simple variation, was to change the orientation, originally a portrait card that I changed to landscape. An addition of a few punched flowers and adhesive gems and this one is good to go! I hope you have been inspired to create!
Creatively Yours,
Sharon