Showing posts with label cards. Show all posts

Monday, March 6, 2017

Embossing Folder Fun

Designed by Sharon M. Reinhart as seen in the CardMaker Update
Just sending out an invitation for you to check out my most recent online CardMaker Update. It's all about creating cards using embossing folders! One of my most favorite tools to create with. To view the full article along with individual card pictures head on over to CardMaker using this link or go to www.cardmakermagazine.com, it is the current issue, Feb. 27, 2017. While you are there check out the archives and also sign up for this free resource to be delivered straight to your inbox every three weeks! Hope you enjoy it and that you are inspired to create!
Creatively Yours,
Sharon

Saturday, February 14, 2015

Happy Valentines Day!!

Project ©Sharon M. Reinhart February 2015

Thought I would share this cute mini canvas, it was created on one of the 5-inch square kids type canvases that has an image printed on them for kids to color. This particular one is from Royal Brush and often available at Michaels. It would work equally as well using a square cardstock card base. I made use of a pocket scrapbooking panel from Simple Stories at the right side along with thread wrapped hearts and a chevron embossed chipboard alphabet letter. The background is a chevron print paper layered onto a robin's egg blue painted canvas. The final touches are red mini heart brads. Hope you like it! Feel free to use this design for personal use but please do not enter for contests or publication.
Creatively Yours,
Sharon

Monday, December 31, 2012

Delicate Paper Snowflakes

These 26 paper snowflakes were created to honor the staff and students of Sandy Hook school. The PTA had put out a call for snowlfakes so that they could transform the new school that students of Sandy Hook will be attending in January into a Winter Wonderland. I believe they have accomplished their goal, as today when I went to the web site to retrieve the address to ship my snowflakes, they had a new note stating that with regret they had to close this project for further donations of snowflakes as they have been overwhelmed with donations. So, my little snowflakes will be donated instead here at home to a project involving children or schools. So, if you too are like myself, I encourage you to visit this site to find out other ways your snowflakes can be used to honor the community of people at Sandy Hook school and help others. http://www.ctpta.org/SANDY-HOOK-FUND.html

If you wish to create snowflakes like the ones shown above for your own creative projects -- ornaments, tags, gift packaging, or cards.  Here are some brief instructions:
1.  Cut out snowflake of choice by hand or using a punch or cutting system. The snowflakes shown here have been created using a Spellbinder'sTM template.
2.  Next cut a scallop shape, one that has an even number of scallops, this scallop circle is 1 3/8-inches. Tape metallic thread to back, wrap thread through the valley of one scallop, count 7 valleys to the right and wrap thread through this valley. Wrap thread around back of shape and to the right of the first wrap. Continue wrapping in this manner until two threads appear in each valley. Adhere thread to the back and trim. Place an adhesive rhinestone to the center. Adhere to one side of the snowflake. Complete an additional thread wrap scallop and adhere to the opposite side of the snowflake.
3.  Finish the snowflake by applying Stickles glitter glue randomly to the snowflake.

As a new year is quickly approaching I would like to take this time to wish you and yours all the best and may 2013 be filled with good health and happiness. Life is as delicate as snowflakes, and just like snowflakes, each persons life and path is different.  I do hope the common denominator will be kindness and compassion. Have a safe and happy New Year!
Creatively Yours,
Sharon

Thursday, May 31, 2012

Mixed Media Class


Project Design ©Sharon M. Reinhart 2012
                 
I am so excited to share this news with you! I am scheduled to teach two classes at the Paint In Alberta Creative Arts Convention being held at the Deerfoot Inn & Casino  in Calgary, September 13 to 16, 2012. I know its a bit early but I thought I would get you thinking about it.
This event has an exhibition attached to it as well, therefore there are also day rates which allow access into see the exhibits, demonstrations, make and takes & cash and carry classes. You must register for the event in order to register for classes that are listed in the catalogue. There is a one day or a two day registration which allows unlimited access to the exhibit hall.There are some wonderful classes and some truly amazing talent!
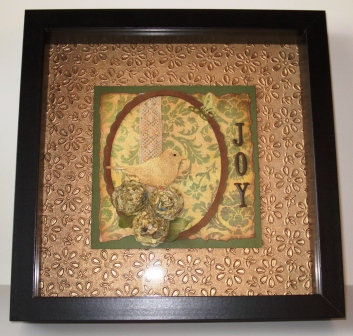
Here is the link to my Friday class -- Joy Greeting Card or Wall Decor #228, scroll to bottom of page(please note cardstock letters will be used in this project rather than metal letters)
and my Saturday class -- Take Time Mixed Media Decor #339, scroll to middle of page
I have linked two other helpful pages as well:
General info
Registration Form

Project Design ©Sharon M. Reinhart 2012
I hope to see many of you that have been asking about my classes at this event. If you require any further info please do not hesitate to leave me a comment on this blog and I will be sure to answer.
Until next time have a great day!
Creatively Yours,
Sharon

Friday, May 4, 2012

Exquisite Embellishments Blog Hop!

Today is the launch of a wonderful new book published by Annie's Attic - Exquisite Embellishments for Paper Crafts TM.
This book is filled with beautiful projects created by some very talented designers, I am thrilled to be amongst their company. I was so pleased to see one of my projects on the cover, the decorated wood tote on the right, which by the way is from a three piece ensemble. The other two beautiful cover projects were created by Sherry Wright and Kandis Smith. Thanks Keri and Tanya for including my work in this beautiful publication!
As seen in Exquisite Embellishments for Paper Crafts published by Annie's Attic
Please join us for the Exquisite Embellishments blog hop and be sure to leave your comments at each stop, as three lucky winners will be drawn at random to receive a copy of this new publication! Comments will be left open from Friday through Monday and the draw for the winners will take place on Tuesday May 8, 2012. To order a copy of your own or as a wonderful gift, click on this link to Annie's Attic.

Keri Lee - http://www.pinklemonade.typepad.com
Sharon - smrdesigns.blogspot.com  (you are presently here)
Jing Jing - http://thislittleartofmine.blogspot.com/
Thanks for stopping by!
Creatively Yours,
Sharon

Monday, April 30, 2012

Tag Art for Mom!

Project Design ©Sharon M. Reinhart 2012
I thought I would share this tag that is beautiful on its own or would make a wonderful card. With Mother's Day quickly approaching this would be a great way to show Mom just how much you care. I created this tag as kits that I will be offering for sale at a fundraising crop that I am participating in. I donated my time and supplies to create a make and take with the ladies. This is not the make and take - still working on that one, guess I better hurry up and get it done. This project is created with a shipping style tag. The Sizzix postage stamp die paired with coaster board was used for the frame and book print paper for the flower which has been die cut with a Spellbinders die.  The music score background from Stampendous was stamped onto kraft color tissue paper and then layered onto the tag. Some brown and copper craft acrylic paint distressing and wire tendrils were added along with a stamped mini domino.  Three different styles of fibers are the finishing touch. Hope you like it!
Creatively Yours,
Sharon


Monday, August 15, 2011

From Card to Home Decor!

Design ©Sharon M. Reinhart 2011
Two areas of paper crafting that I really enjoy are cardmaking and home decor projects. Well for this project I made use of a card that I had created for a recent CardMaker newsletter article -- From Trash to Treasured Cards, not only were the flowers created using an old phone book, Spellbinders scallop dies and inks, but now I have also repurposed the card into a home decor piece. I layered the card onto beautiful embossed daisy paper and then placed the project into an Ikea frame. So, go take a look at your collection of cards, maybe some of them would make a perfect home decor piece. Time and time again I look at wall decor pieces in the store and say "I can make that" and I never take the time out to do it, so this was a step in the right direction. There is hope for me yet!  Enjoy!
Creatively yours,
Sharon
Blog Hop Button Finished on the 15th: FaveCrafts Blog Hop for August

Saturday, July 30, 2011

Tea Bag Folded Recycled Treasure!


Card Design ©Sharon M. Reinhart 2011
Well, I am at it again - recycling that is!  I used one of my favorite papers to create this tea bag folded medallion - the inside of security envelopes!  They have a variety of patterns and colors.  This tea bag folded medallion also has another twist.  I have used a squash fold and then to give a bit more dimension I gently curled the points on the top layer - just like you would curl a ribbon.  The layers are created using Spellbinder's Labels Twenty One die set and also the Stampin' Up Square Lattice embossing folder.  This folder creates a wonderful textured card stock out of regular card stock - it looks quite substantial.  A glitter brad and a few rhinestones as well as the Inspirational Words Border stamp from Crafty Individuals (Magenta) and my card is complete.  If you would like to learn more about Tea Bag folding check out my most recent book Tea Bag Folding Through the Seasons by clicking on the cover shot at the top right.  Also if you would like to add recycling techniques to your card making please visit the Cardmaker online newsletter From Trash to Treasured Cards July 11, 2011 issue - it's free, sign up today.
That's all for this post - Enjoy!
Creatively yours,
Sharon

Friday, July 22, 2011

Congrats! Iris Fold Card

Card Design ©Sharon M. Reinhart 2011
Congratulations is one of those multi purpose greetings that can be used for a variety of special occasions. I created this card for a couple who were recently married in Mexico - hope they like it!  However, this card would also be perfect for a shower, birth of a child, new job, and graduation to name a few. The card was created using an Iris Folding Technique however instead of folding the strips in the traditional way I simply cut them into half inch strips, the solid color strip is a quilling strip. If you are looking for further info on Iris Folding please check out my second book Iris Folding For Christmas by clicking on the photo to the right.  Keep in mind although the designs in this book are Christmas designs it is easy to create cards for other occasions by simply using different papers.
I created the flourish on the corners by die-cutting a fancy tag and then cut it in half and attached it over the corners on the frame. So if you are into using what you have - most people are, use printed papers that coordinate and for the texture on the white frame I cut two pieces of plastic canvas and placed my frame in between then ran it through my Big Shot Machine to emboss.
The materials used in creating this card are a Frame die by Sizzix (I use this one often), Fancy Tags Die Three & Petite Oval Small Die by Spellbinder's, printed papers by Black Market Paper Society (sorry I am not sure that this paper is current I was using leftovers today), brown cardstock, white pearl cardstock, rubber stamp by My Sentiment's Exactly, Chestnut Roan Fluid Chalk ink by Clearsnap and the final touch are a few rhinestones. If you have not tried Iris Folding I encourage you to give it a go.  It truly is not as complicated as it looks. If you are looking for classes or interested in purchasing further design instructions please leave me a comment.
Creatively Yours,
Sharon